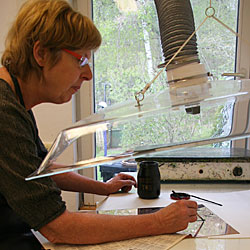
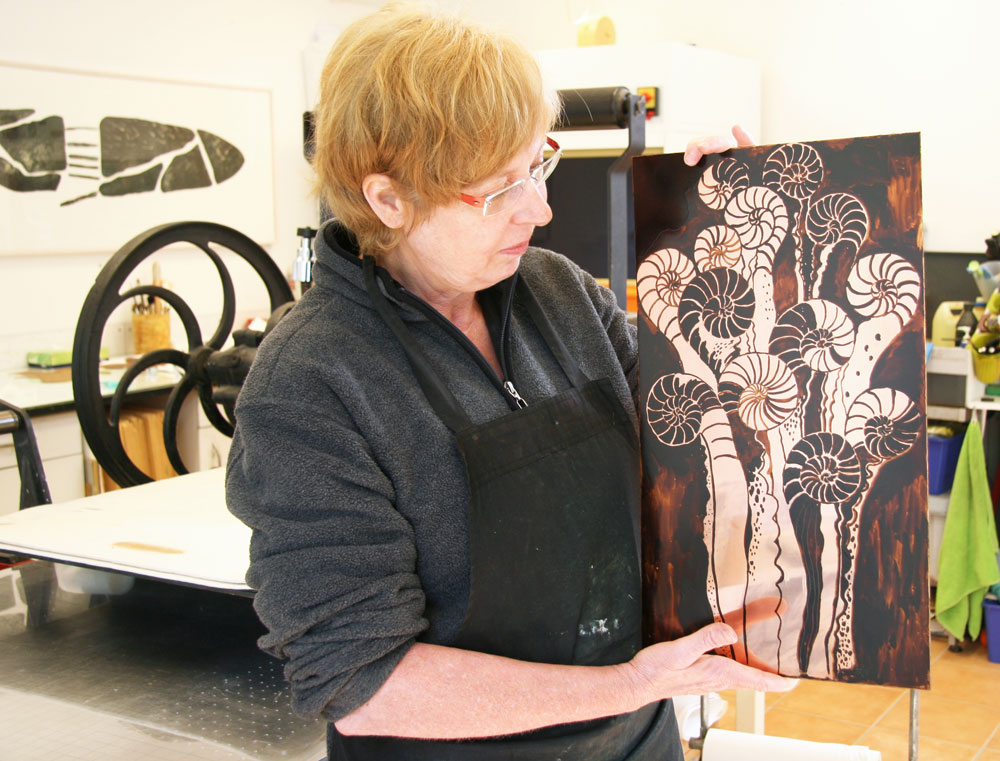
Catharina Warme-Hellström has invited us to her studio to follow her in the process of making an etching.
Catharina gets much inspiration from her beautiful garden which is adjacent to the forest near her studio. She cares about her plants and the wild birds and animals who like to visit her garden.
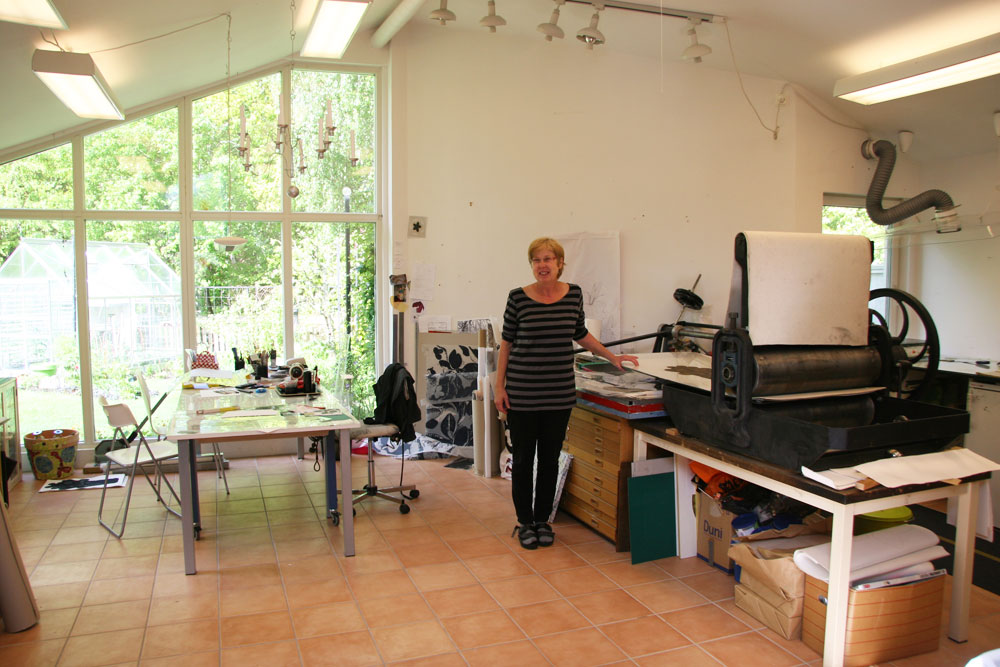
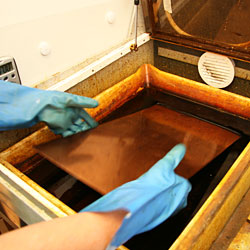
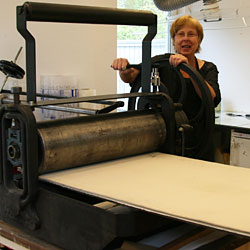
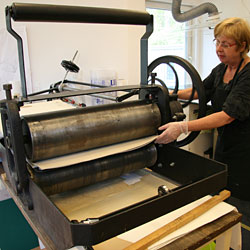
Catharina has her own printing press in the studio.
After following Catharina for two weeks in the process of making an etching, we have learned that the etching technique requires – in addition to artistry – an enormous amount of work, accuracy, energy and stamina.
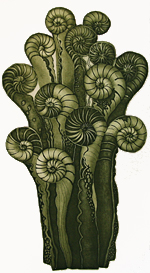
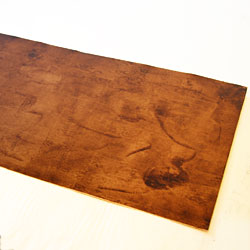
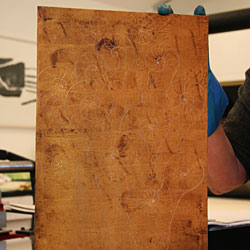
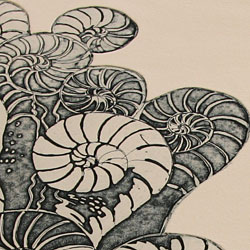
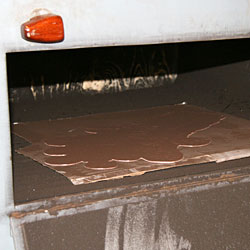
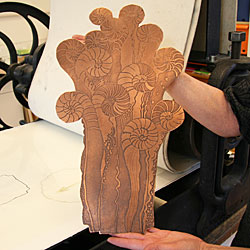
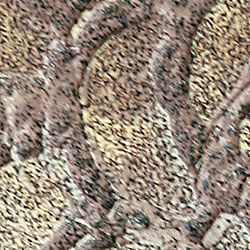
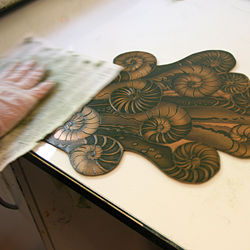
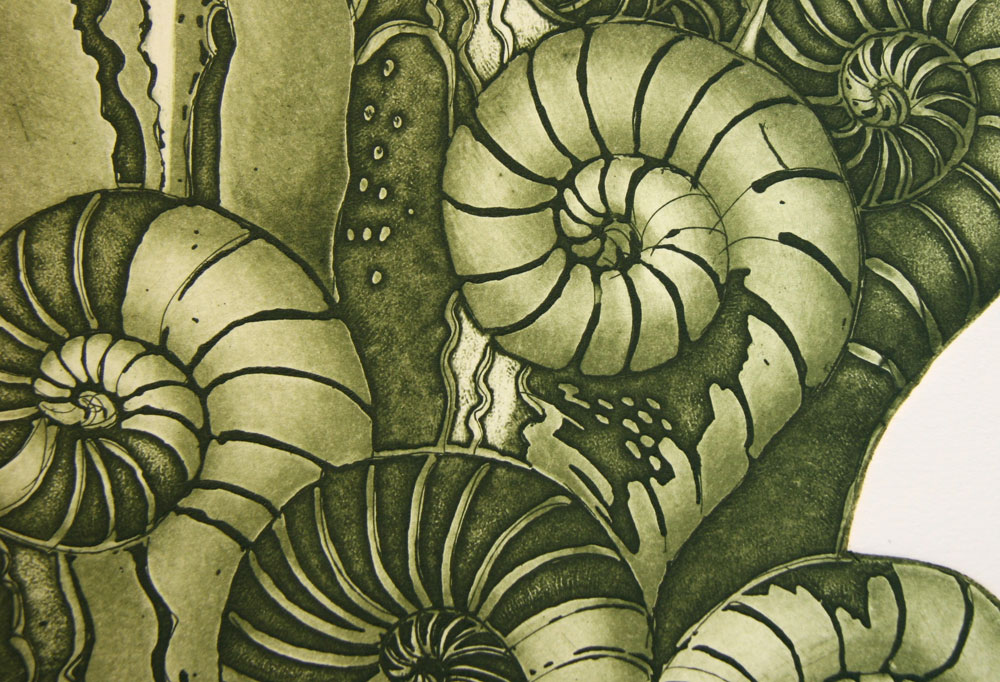
The test print in green below, will eventually be incorporated into a new artwork by Catharina. She always combines multiple graphic techniques in her pieces of art.
The graphic etching technique is an example of deep printing. The etched parts of the plate (Catharina uses copper) are filled with ink, which, under high-pressure, are then passed on to paper.
Welcome to our ” journey” in explaining the etching process.
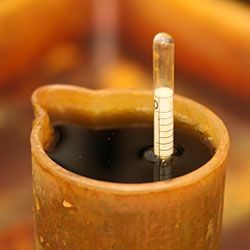
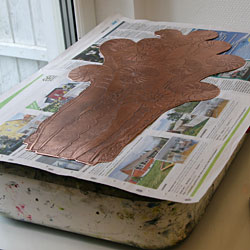
Test print in green.
Karin Norén, Enjoy Scandinavian Art, and Catharina Warme-Hellström.
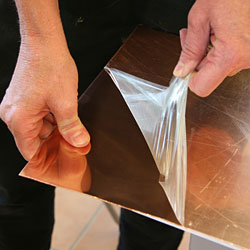
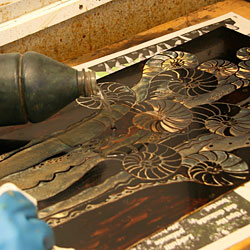
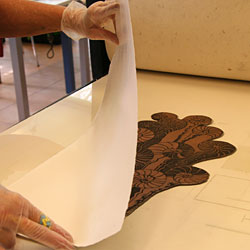
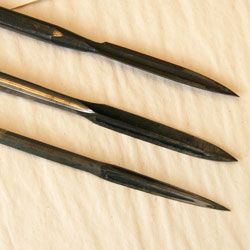
Preparation of the copper plate before the first etching bath
Peeling of contact paper for deep etching. The copper plate is 1 mm thick.
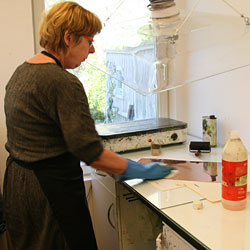
The plate is degreased with methylated spirit to be completely clean of grease and dirt.
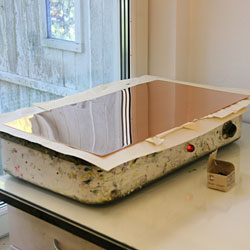
The copper plate is heated on a hot plate before it is protected with a thin layer of hard ground.
Asphalt is used as hard ground. Ground is an acid-resistent substance used to cover and protect those parts of the plate from being bitten by the ething solution. The ground must be flexible enough to allow fine lines to be drawn on it.
The plate is heated to slightly above 60 degrees Celsius in order to melt the hard ground so Catharina easily can apply a thin layer of asphalt. Ideal for this is an electric hot plate.
The hard ground is spread over the plate as evenly as possible using a roller. Once applied, the etching plate is removed from the hot-plate and allowed to cool which hardens the ground. The copper plate is covered with this layer in order to protect the plate from the etching solution – ferric chloride.
The opposite side of the copper plate is painted with shellac in order to protect it from being etched. Catharina prepares the shellac by mixing shellac flakes in methylated spirits to a suitable consistency.
The plate is left to dry. Shellac is durable and will last through the entire etching process.
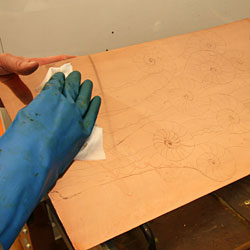
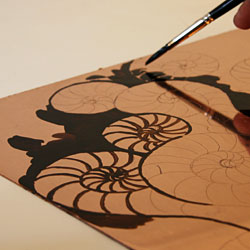
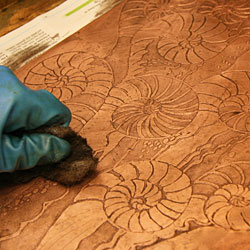
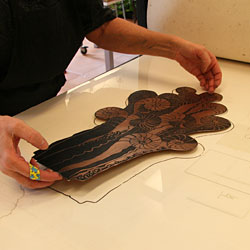
The copper plate is prepared for drawing. Asphalt is a hard ground, and drawing on it in the printing process, will result in the appearance of lines of ink.
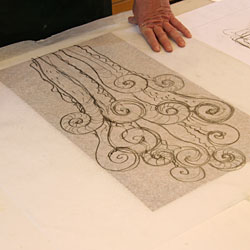
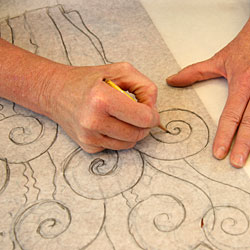
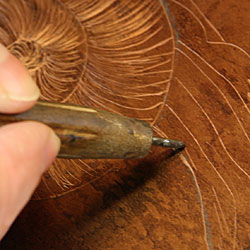
The thin paper with the pencil sketch is placed on the copper plate.
The thin paper is turned upside down in order to flip the pattern horizontally.
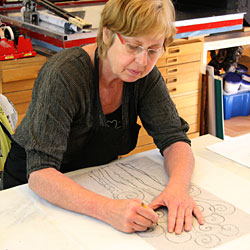
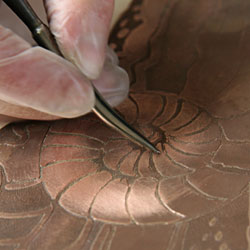
The sketch is transferred to the copper plate manually, and the pattern on the copper plate is now mirrored.
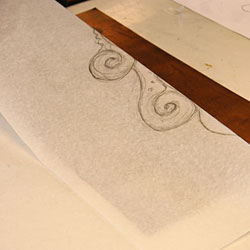
Close-up of the sketch being transferred to the plate.
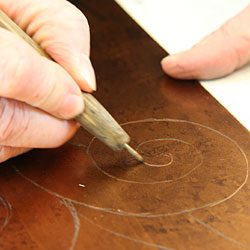
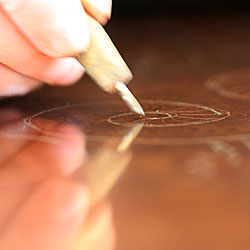
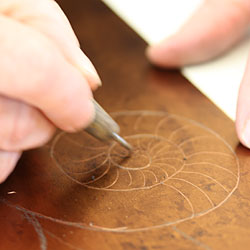
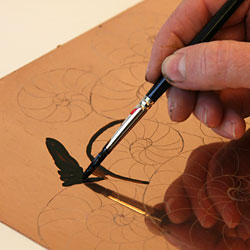
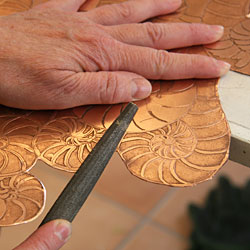
The design is then drawn (in reverse) with an etching-needle with slight pressure. During the drawing, the thin protective hard ground is removed and the copper surface is exposed in these lines.
The needle used to draw the design should be properly prepared, its point should be blunt so as not to scratch the metal through the ground; this could cause foul bite.
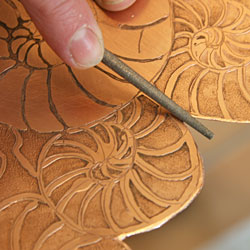
Drawing (or erasing) in the plate´s hard ground.
The pattern is emerging gradually.
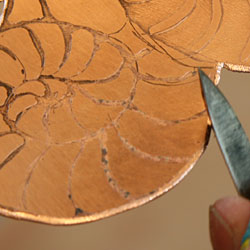
The copper plate is prepared for the first etching bath.
Close up of a detail in the previous image. The copper plate is prepared for the first etching bath.
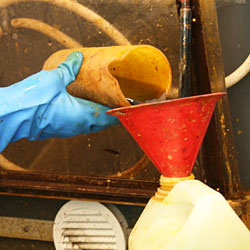
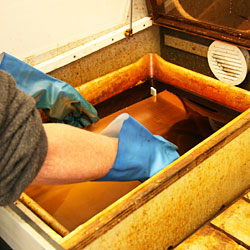
Preparation of etching fluid – ferric chloride solution (24%) for the first etching bath. Catharina prefers ferric chloride solution to nitric acid and hydrochloric acid which are other commonly used etching liquids. The etched-line character depends on which acid/solvent is being used in the process.
The density of the ferric chloride solution is checked by a hydrometer. A lower concentration of ferric chloride slows down the etching process. If the process is too fast, the hard ground risks being damaged, and tightly drawn lines might be etched together. The etching rate also depends on the temperature of the bath.
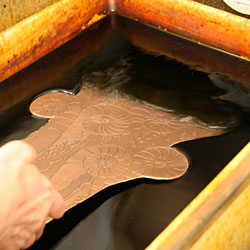
The first etching and preparation for the second
The copper plate is immersed into the bath of ferric chloride solution. The first etching process has started.
After 35 minutes, the copper plate is removed from the etching bath. The etching time can vary considerably, ranging from one minute to several hours, depending on what kind of result you want to receive.
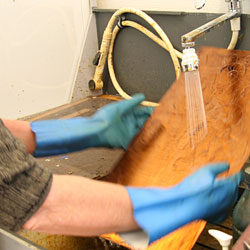
Both sides of the copper plate are rinsed under cold, running water.
One can feel the lines where the etching fluid has been active.
Ferric chloride solution is disposed and recycled. Ferric chloride solution is more environmentally friendly than the acids, but also requires the use of safety goggles and protective clothing when handling.
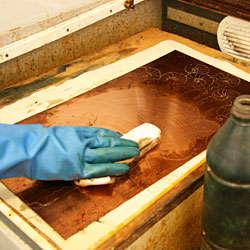
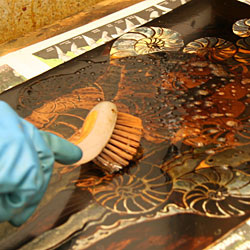
The hard ground is washed off with white spirit and then rubbed dry with a cloth.
The copper plate is washed with methylated spirit to remove grease.
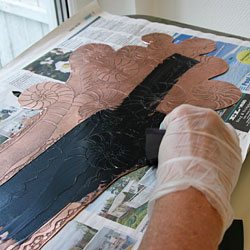
The next step is to etch major parties – so-called open biting. The areas not to be etched are painted with liquid asphalt.
Catharina puts the copper plate under an extractor. The liquid asphalt paint is solvent based and gives off a strong odor.
The entire surface to be protected from the etching liquid is painted with liquid asphalt.
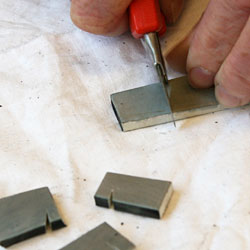
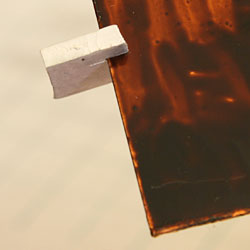
Cutting a piece of rubber.
The piece of rubber is placed on the plate. The pieces are added to avoid the copper plate from being placed tightly against the bottom of the trough.
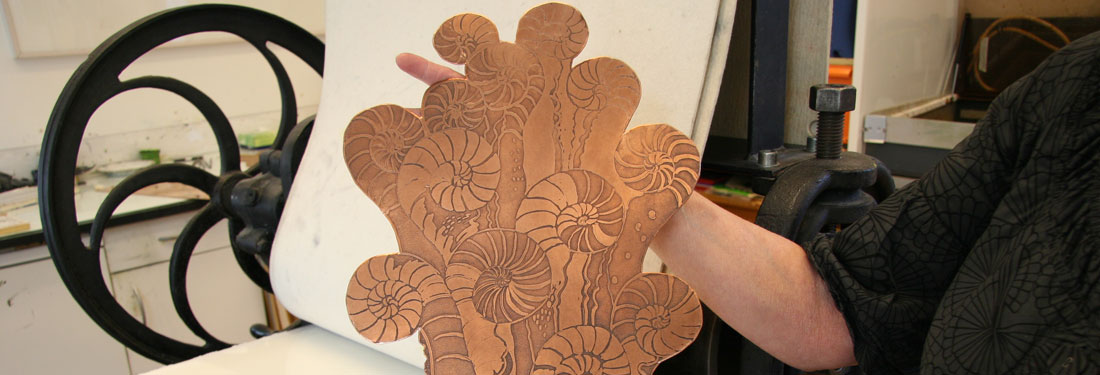
Catharina holds up the pre-painted copper plate which is now ready for the second etching bath.
Second etching and preparation for the third
The plate is immersed into the bath of ferric chloride solution for the second time. The plate is placed with the painted surface down in order to shorten the etching time.
The copper plate is immersed in the trough. Then, the plate is etched for several hours to achieve the desired result. It is the exposed surfaces that will be etched. The results are checked at regular intervals.
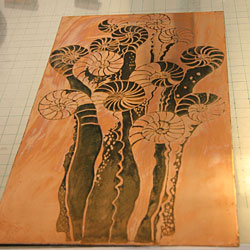
The result after the second etching. Open biting means that larger areas are exposed to the etching fluid for a longer time. The areas exposed to the etching fluid will be rough and eventually show a grey tone on paper when printed under high pressure.
Here one can see that the protective asphalt ground (the brown areas) are intact.
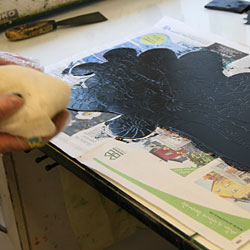
The asphalt layer is removed from the plate with white spirit.
Continued cleaning.
The copper plate is wiped clean.
Result after the second etching.
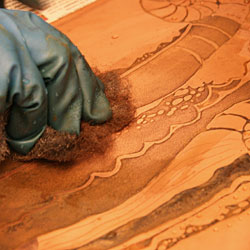
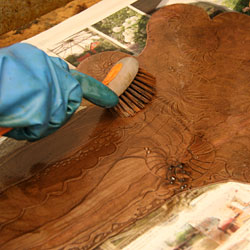
Cleaning of the etched parties with steel wool.
Cleaning with steel wool.
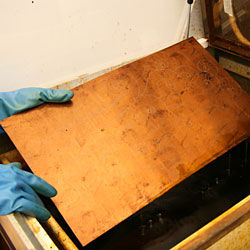
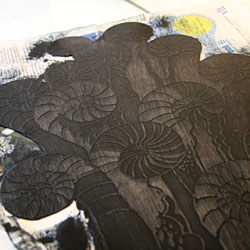
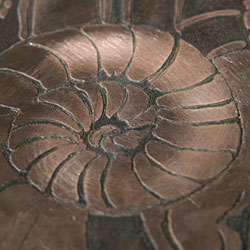
The result after cleaning with steel wool. Please notice how beautiful the copper plate is.
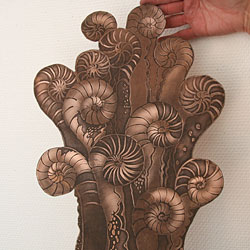
Catharina always processes her copper plates by cutting out the profile of the art work – which is a method that is not so common among artists. It gives a unique expression that Catharina wants to achieve.
Cutting the plate.
Smoothing the edges with a jigsaw.
Filing to remove burrs and to get the edge smoother.
Filing at the plate edge.
The last rough edges are removed with a scraper.
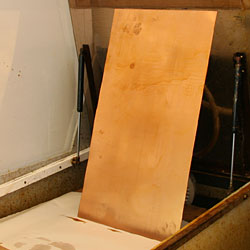
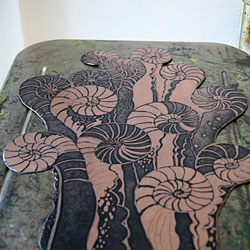
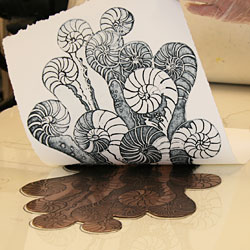
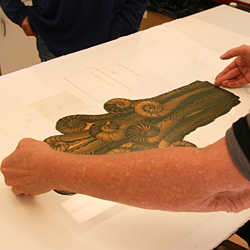
Completed result and the plate is ready for a first proof.
First proof print
Catharina uses a German Hanemühle paper which consists of 50% cotton and 50% paper. The paper has a beautiful finish as well as the right properties which include right thickness, color receptivity, strength and pliability. It is also wood-free and non-yellowing.
The thickness of the paper is measured in the weight of the paper in grams per square meter.
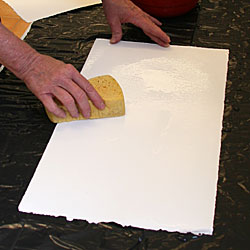
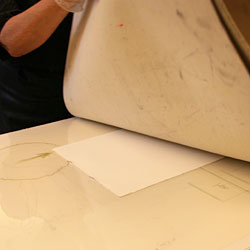
The paper is moistened before the printing process in order to increase the paper’s smoothness and suppleness.
The paper is moistened with a wet sponge for a few hours before the printing start. To prevent drying, a plastic sheet is placed on top and underneath.
Preparation of printing ink for deep printing. In order to make the ink slightly thinner and lighter, it is mixed with a little raw linseed oil.
The plate is heated on the hot plate before staining with ink. The temperature of the hot plate in this stage is approximately 40-45 degrees Celsius.
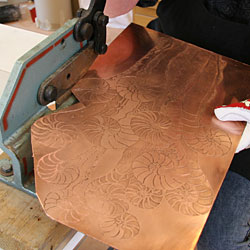
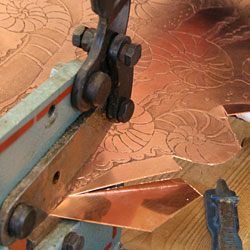
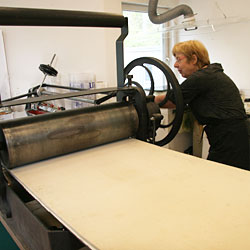
The intaglio press basically consists of two steel rollers mounted in a frame. Between these rollers a pressure bed is placed. Catharina adjusts the pressure with screws that raise or lower the upper cylinder.
Close-up of the adjustment of the upper roller pressure.
Catharina marks on the bed where the copper printing plate will be placed.
The marking of where the plate shall be placed. Everything is prepared for the first proof.
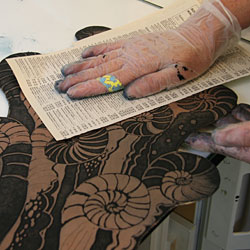
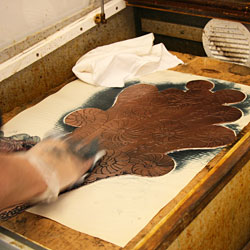
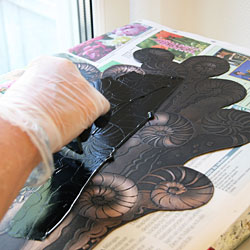
The ink is applied with a rubber filler. The copper plate stays on the hot plate in order to keep it warm so that the ink easily floats. When the staining is complete, the plate is removed from the hot plate.
The abundance of ink is wiped from the plate with a cloth of tarletan which is folded to form a smooth ball. The plate is dried in different directions until the image is clearly discernible.
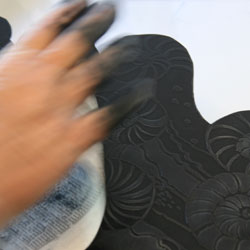
Appearance after wiping with tarletan. Drying is done with light pressure by hand.
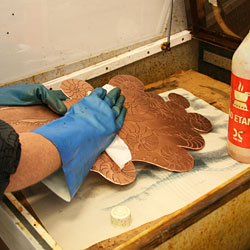
Catharina dries the plate carefully using paper from a telephone directory, which she has discovered is ideal for this purpose. Here it is important that it is exactly the right amount of ink left in the cavities.
The plate is heated on the hot plate for a short time and is now ready for a first proof. A thin film of ink remains after the wiping which will give the print the right shade. Much experience is needed in order to get a good result.
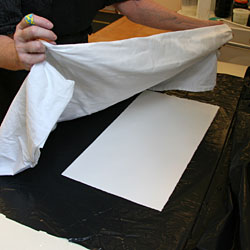
The paper is dried off before printing.
The copper plate is placed on top of the template on the press bed.
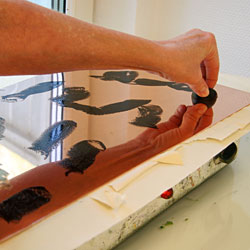
The paper is placed on the copper plate.
The press blankets are gently placed on top of the paper. The wetted printing paper is pressed down into the plate´s lines and depressions.
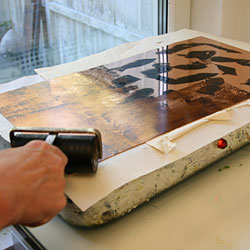
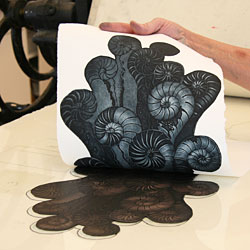
The first proof – when Catharina turns the wheel the upper roller drives the printing bed forward.
The printing bed has almost gone to the other side.
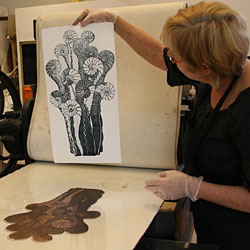
Now we can see the result.
Catharina examines the result.
The first proof together with the original plate. This proof is only a step in the process to view the result after the second etching.
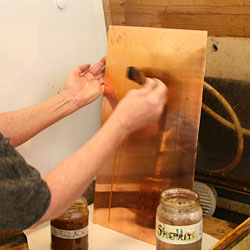
Washing with white spirit in order to remove the ink.
Degreasing with methylated spirit. Now the plate is ready for the next step, aquatint.
Detail of the painted copper plate. It is the painted surfaces that are protected from being etched.
The corresponding area on the etched plate. The open-bitten areas = the dark surfaces. Note that the plate is reversed compared to the proof (in the next picture).
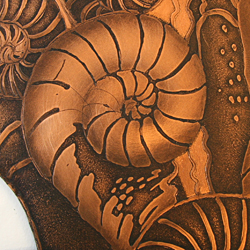
Details of the proof. The etched surface that is deep enough gives a soft black outline, because slightly more ink is collected at the threshold between the etched and the non-etched metal surface.
Aquatint
Aquatint is a variation in which particulate asphalt is evenly distributed on the plate, then heated to form a screen ground of uniform but less than perfect density.
After etching, any exposed surface will result in a roughened (darkened) surface.
The process aquatint allows for the creation of tones, shadows, and areas of solid color.
The following series shows us how it works.
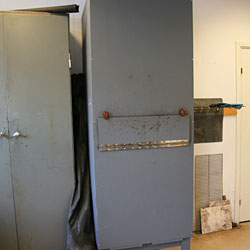
Cabinet of aquatint – the cabinet floor is covered with a fine powder of asphalt. At the bottom there are brushes that can be rotated. When cranking the crank on the cabinet exterior, the asphalt powder is whirled up.
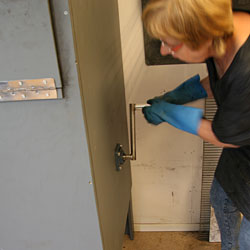
Catharina cranks in order to whirl up the asphalt powder.
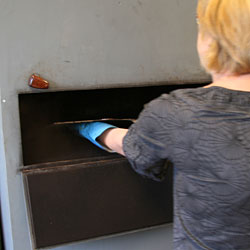
After the powder has whirled up, the plate is placed on a shelf in the cabinet. The asphalt powder slowly falls down on the copper plate.
After a while the plate is taken out – this shows a thin layer of asphalt powder.
Detail of the aquatint copper plate – you can see that asphalt powder is added to the plate and on the paper.
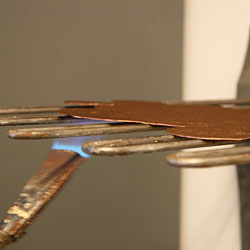
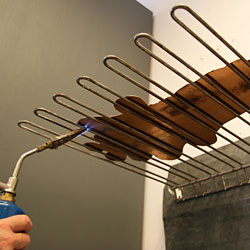
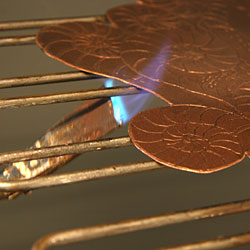
The plate is placed carefully on an iron grill…
… and heated gently until the grains of asphalt have melted.
After heating the plate, you can transport the plate. However, one should be cautious because the surface is fragile.
The third etching
The plate prepared for the third etching bath.
The plate is immersed in the third etching bath. It will be etched for 25 minutes.
The plate is removed and rinsed thoroughly.
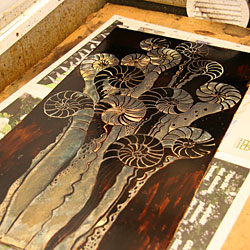
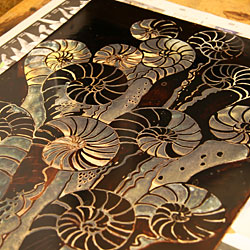
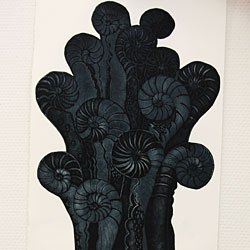
Results after the third etching bath. Asphalt dots forming a grid that protects the plate from etching fluid – the other areas are etched. This means that the ink adheres to the etched surfaces. If a second proof would be made at this moment, it would be nearly black all over the entire surface, showing only the contours of the pattern.
Magnification of the detail in the image on the left. One can see asphalt dots that have protected the plate from the etching liquid. Other parts are etched. The next step is to clean the plate from the asphalt spots.
The plate is washed with white spirit to solve the asphalt dots and then degreased with methylated spirit.
Processing the copper plate and the result after the second proof
When the plate is cleaned and the processing tools are ready to be used, a satisfied Catharina exclaims: “– Now the fun part begins.“
The heavy work is done and the subtle, artistic, gentle processing of the plate is about to begin. Catharina is really passionate about this graphic technique.
For the uninitiated, the process is perceived as incredibly time-consuming – something to consider when purchasing graphic art. We hope this presentation will give an insight into the enormous work behind an etching.
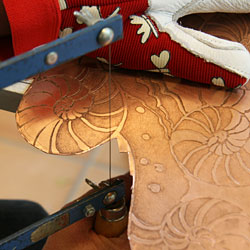
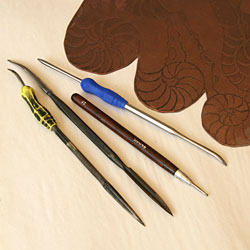
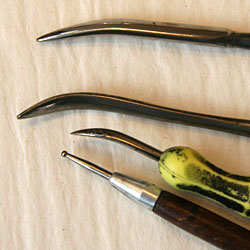
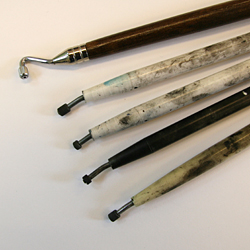
Tools for processing the plate.
Polishing steel – tools for processing the plate. The polishing steel is a gently curved steel blade.
Three-edged scrapers.
Roulettes for processing the plate.
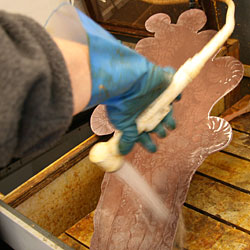
Sanding with wet sandpaper for metal.
Sanding with wet sandpaper to make the surface brighter and smoother – which in the next proof will show a brighter area.
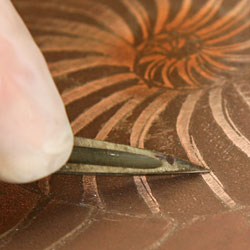
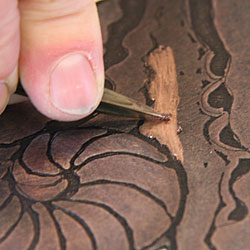
Close-up of processing of the plate. The scraper will lighten the surface.
Close-up of processing of the plate. The burnisher smoothes the bumps.
The brighter areas will also be bright in the printing process because these surfaces are smoother and less ink will be attached in these areas.
The light parts are the processed parts.
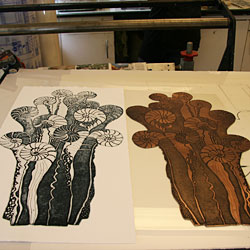
The second proof print: we can now see that a gray scale is beginning to emerge. The plate needs to be lightened up further to enhance the gray scale. A difference in shade will also give the image a larger volume. Catharina continues with the artistic work to polish the plate.
A number of proofs in order to achieve the desired result
The copper plate is stained with ink in the same way as earlier.
The abundance of paint is wiped off in the same way as before – using tarletan to begin with and then paper from a telephone directory.
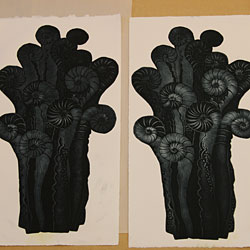
The third proof print.
The second and the third proof print. Here one can see that the gray scale has increased and more volume is created.
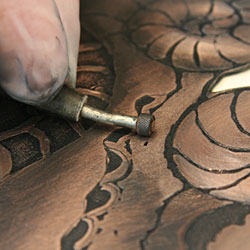
Further processing of the plate. Catharina is darkening a small area with a roulette.
Catharina is brightening an area with a scraper.
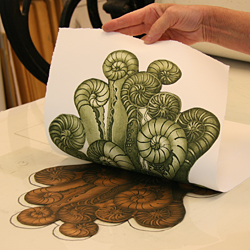
Proof in green
After a number of proofs in black, Catharina is now pleased with the transformation of the plate and is now ready for trying a different color.
Each time a new print shall be made, the plate has to be colored again. This time Catharina is using a green ink – the color shade that she has decided for the final art work.
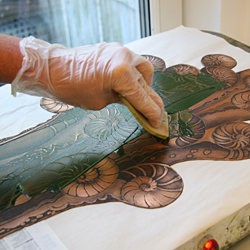
The abundance of the paint is wiped off the same way as earlier – first using tarletan …
… and then with paper from a telephone directory.
The copper plate is placed on top of the template on the press bed.
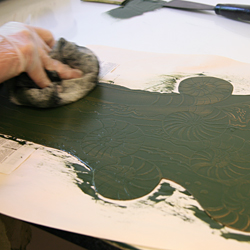
The result.
Catharina examines the finished result.
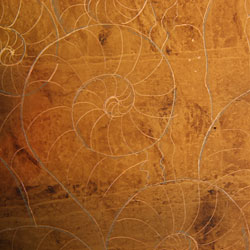
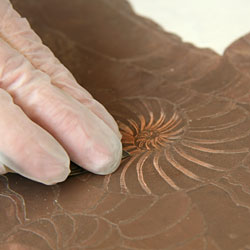
Here you can see how the piece of art is gradually emerging.
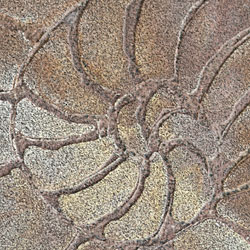
Details of the proofs 2-5
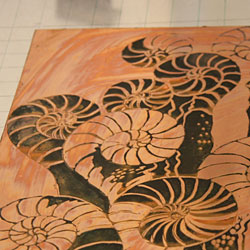
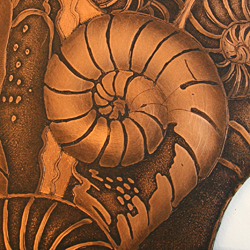
Detail – upright copper plate.
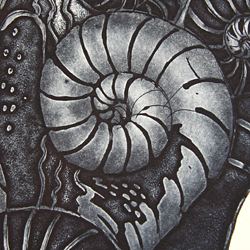
Detail – mirrored copper plate, in order to easily compare the plate with the pattern in print. In the following proofs, you can follow and see how the art work´s volume gradually increases via four proofs. The copper plate is processed between the test prints until the final results in green.
Proof 1 – before the aquatint.
Detail proof 2 – after aquatint and processing.
Detail proof 3 – more processing.
Detail proof 4 – even more processing.
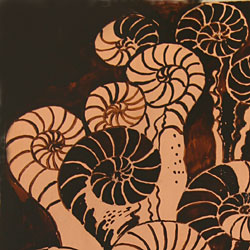
Proof 5 – Detail in green.
Christina Wallnér och Karin Norén Enjoy Scandinavian Art Photo: Christina Wallnér, No WaIT AB